5 Simple Tips To Remove Moss From Block Paving
How to remove moss from block paving? Having a block paving driveway or patio surface that’s clear of any moss is very important! Not only will it look clean “but” keeping up regular maintenance on your block paving will help prevent the moss from damaging the slabs over time.
However, trying to remove moss from block paving it can be a tricky process, especially if you don’t have the correct tools or knowledge.
Most people would say the best way to remove moss from block paving is to simply use a pressure washer, and although this may work for a short time, simply blasting it with water doesn’t completely remove moss.
Many people are unaware of this but moss contains spores and using a pressure washer without first clearing away the moss spores you could be doing more harm than good.
5 Simple Tips To Remove Moss From Block Paving
For some gardeners, moss can be a beautiful addition to their outdoor space, however, for others, it can be an annoyance that just won’t go away.
When you have moss on your block paving, it can be hard to get rid of especially if it has been sat for long periods of time!
It can grow in the cracks and crannies of brick or stone pavers and makes them look unkempt. You might even find yourself frustrated by using weed killer because the moss just comes right back after a few weeks.
As before, removing moss from block paving can be a tricky process! But, by following these 5 simple tips below not only will this give your block paving a new look “but” will also help stop any moss or weeds from growing back.
You May Also Like To Read:
1. Clear The Area Of Any Objects
The first thing you need to do is make sure the area is free of any furniture and planet pots especially when using chemicals as this can damage the materials.
Moss is very resilient and can survive under the harshest conditions including under plant pots. If just one spore survives you could find yourself cleaning your patio more often.
This is why we don’t recommend just using a pressure washer without removing all the moss and weeds first, as this will cause spores to break off from the pressure and could end up under an object where the moss could reproduce.
Unlike plants, moss has no roots which means it doesn’t have to be planted in the ground to survive and grow making it very resilient. If you want to know more about this we recommend you read this article Does Moss Have Roots?
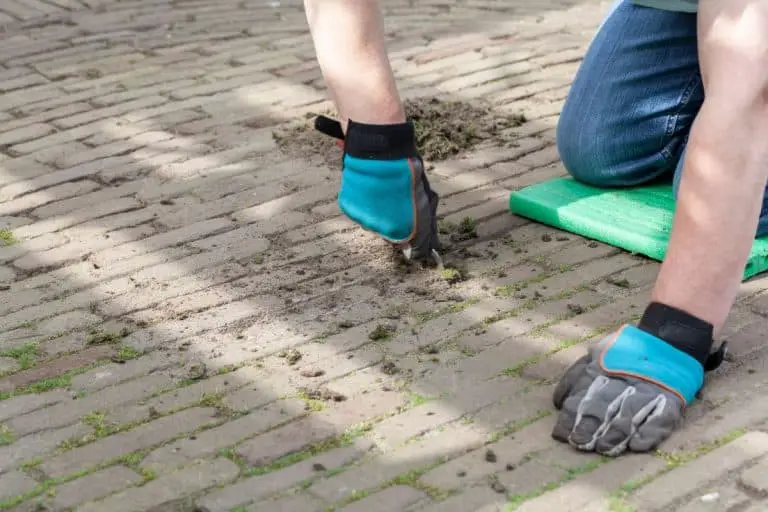
2. Use A Metal Brush
So once the block paving has been removed of all objects you need to start removing the moss and the easiest and best way to do this is to use what’s called a weeding wire brush tool.
Using one of these tools will make the process a lot easier and you’ll be able to get in between blocks to remove any moss, weeds, or dirt.
This part is very important as just the smallest amount of moss or weeds that are left behind can start the whole process off again and your find that after a couple of weeks the moss and weeds are growing back.
There are two types of weeding wire brush tools there are the long handle types which is similar to a standard brush, or your next option would be to use a short handle wire brush.
Now, using a wire brush will take some time depending on the size of your block paving, however, removing the moss and weeds correctly will give you much better results not to mention making your patio or drive look cleaner.
If you are unsure where to purchase one of these wire brushes one place we recommend is Amazon there you can check the current prices and also read their customer reviews!
3. Remove All The Moss Leaves
Once all the moss has been removed from in between the blocks and surrounding areas you need to sweep up all of the loose debris and any roots from the weeds.
Remember to take your time with this because as before leaving just one root or moss spore that’s been left behind can just the whole process off again.
Some of these moss spores are very small to see so it’s a good idea just to give the block paving a second going over with the sweep just to make sure you leave nothing behind.
4. Brush Block Paving Cleaner Into The Surface
So now that the area is clear of moss and weeds the next thing you need to do is to use a type of High-Performance Block Paving Cleaner this is what’s going to give your driveway or path a new look.
Block Paving Cleaners are great for removing dirt and grime or any trapped dirt in areas that you can’t get to with any weeding tools.
However, depending on what type of cleaner you have there is a waiting time once you’ve brushed the paving cleaner on the surface which can be anything from 30 minutes up to 2 hours.
Some of these paving cleaners are also Bleach-free, biodegradable, and have an unlimited shelf life so if you don’t use all the products then you know it is ok to use for when you need them next.
Although there is a waiting time, the results are well worth it if you want your block paving “moss free” and looking great.
Recommended Block Paving Cleaner
There are plenty of moss killers on the market today “yet” when using it on block paving you want one that has a gentle formula and contains no bleach or acidic chemicals which could end up harming the surface.
Preferably you want one that can be used on all surfaces “but” at the same time eliminates tough moss, mold, mildew, and algae stains.
One that is perfect for killing moss and weeds is the Wet And Forget Moss Mold Mildew & Algae Remover not only is it very easy to apply but also contains no harmful chemicals and can be used on all surfaces.
- Can be used on all surfaces
- No bleach or acidic chemicals
- Easy spray & leave formula
- Coverage: 60-180 square feet
If your wondering if bleach will kill moss the answer is yes, however, bleach is packed with strong chemicals that could end up damaging the surface of your path or driveway.
Although using bleach is very effective at removing and killing moss if you constantly use it to clean your block paving eventually the blocks will start to fade over time.
You could use high-quality paint giving them that new look, however, the problem with this is, soon as you start using bleach the block paving will start to fade again.
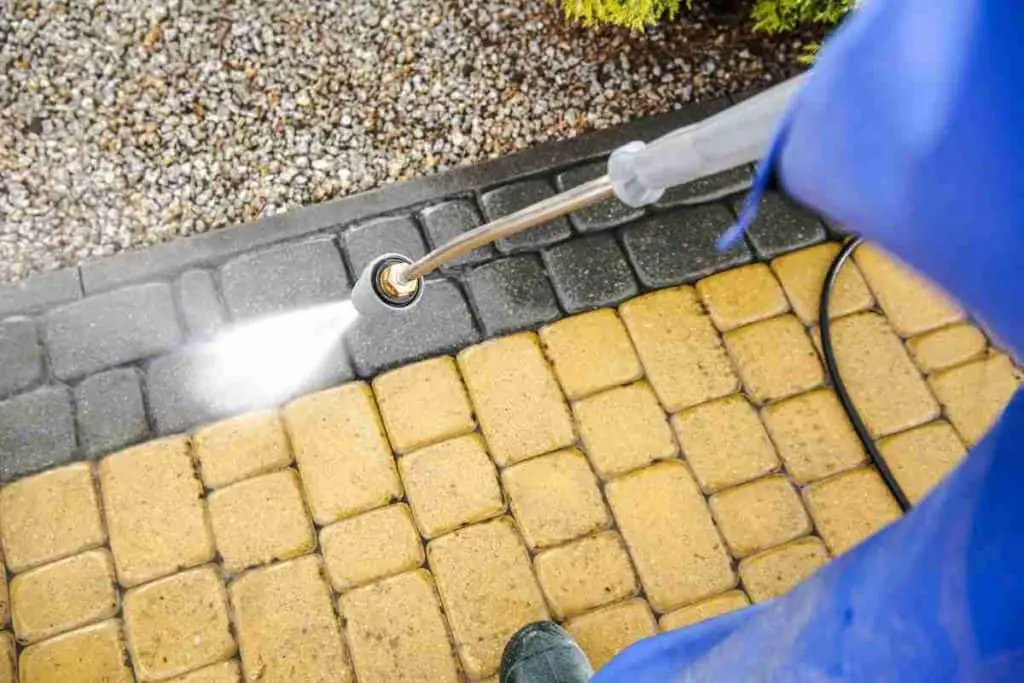
5. Use A Pressure Washer
Once the block paving cleaner has been left to do its work you can then use a pressure washer to remove the soap or any moss you may have missed from the surface and between the blocks.
You can use a hose for this, of course, “but” the results won’t be nearly as good as if you were using a pressure washer.
A Pressure washer is one of the best ways to remove moss, dirt, and grime from the surface “but as before” never use it until the area is free of moss spores.
Typically, you want a pressure washer that has an adjustable nozzle so you can adjust the spray pattern and have increased or decreased water flow as needed.
Once you have gone over all the blocks to remove all the dirt and grime you should repeat the process. This is what going to give your block paving that new look.
It’s also a good idea to give your plant pots a wipe down before placing them back the block paving just in case there are any loose moss spores underneath.
You May Also Like To Read:
Stopping Moss From Growing Back On Block Paving
Now, this is a hard question to answer because, as before, moss is very resilient, and even if your block paving is free of moss there’s still that chance spores can get blown onto your driveway or patio start to reproduce.
You see, moss has what’s called “Gemmae” on the stems which are designed to break off and form new plants, and because moss is very light these spores are able to travel with the wind.
Not only does moss grow on rocks, driveways, and patios but also grows on trees, and if there’s a storm or any high wind these spores can travel at great distances.
Moss thrives in damp areas so the best way to stop moss growing back on your block paving is to keep it dry as possible. Making sure there are no gaps between the blocks can also help prevent moss from growing
Although this won’t completely stop the moss from growing back it can limit the amount of moisture in the pavers and joints that moss thrives on!
Keep Up Regular Maintenance
Many people are often surprised to learn that block paving can be a costly investment in terms of both time and money.
Block paving is an attractive option for many properties because it’s durable, low maintenance, and doesn’t require much upkeep. However, if you want your block paving to look its best year-round then you need to do regular maintenance on the surface.
Keeping up regular maintenance on your block paving is very important especially if you have a lot of weeds. Given enough time the weeds will eventually start to damage and crack the paving.
If you leave moss to grow on the block paving over time it will start to stain the block losing its color.
So keeping up regular maintenance on your block paving can help to avoid this, because in the end if you’ve spent a lot of money on your patio or driveway the last thing you want is the blocks looking all old and full of stains.
We do recommend that you add a Surface Protector Sealer that will shield and protect your block paving from moss and weeds “but” also any harsh weather conditions that may occur.
Final Thoughts
So there are 5 simple tips you can use to help remove moss from block paving, “but just remember” moss or even weeds for that matter are very hard to remove permanently.
Moss is a common problem in gardens and can be difficult to remove especially from brick paving. It grows quickly, forming tiny plants with leaves that gather moisture and nutrients from the air around them.
This is why regular maintenance is sometimes needed especially with weeds “if left to grow” that could end up damaging the blocks themselves.
Once you have completed all these steps we do recommend that you add a protector sealer mentioned above to help preserve your block paving.
You can use moss protector sealer on any surface- including brick, block paving, or natural stone. It’s easy to apply with a brush or spray bottle dries within two hours and can last up to five years!